Raspberry Pi Installation
DreamFactory has been tested for install on Raspberry Pi 4 with 4GB of ram using the Raspberry Pi lite OS 64bit (Bookworm release 12). The install process focuses on an Nginx web server with MySql as the default database (the site is published on port 80 of the localhost). This guide provides instructions for downloading, installing and running the necessary packages to host DreamFactory.
Update pre-installed packages
sudo apt update
sudo apt upgrade -y
Install PHP and Dependencies
First, install the lsb-release package which is needed for PHP installation (likely installed by default):
sudo apt install lsb-release
Add the PHP repository:
curl https://packages.sury.org/php/apt.gpg | sudo tee /usr/share/keyrings/suryphp-archive-keyring.gpg >/dev/null
Create the source file:
echo "deb [signed-by=/usr/share/keyrings/suryphp-archive-keyring.gpg] https://packages.sury.org/php/ $(lsb_release -cs) main" | sudo tee /etc/apt/sources.list.d/sury-php.list
Update the package list:
sudo apt update
Install required system packages:
sudo apt-get install git curl zip unzip
Install PHP 8.3 and required extensions:
sudo apt-get install -y php8.3-common \
    php8.3-xml \
    php8.3-cli \
    php8.3-curl \
    php8.3-mysqlnd \
    php8.3-sqlite \
    php8.3-soap \
    php8.3-mbstring \
    php8.3-zip \
    php8.3-bcmath \
    php8.3-dev \
    php8.3-ldap \
    php8.3-pgsql \
    php8.3-interbase \
    php8.3-gd \
    php8.3-sybase
Install Nginx and PHP-FPM:
sudo apt-get install -y nginx php8.3-fpm
Configuring PHP-FPM
You will need a text editor for this task. The instructions use Nano which comes installed on RPi.
-
Edit the php-fpm php.ini file:
sudo nano /etc/php/8.3/fpm/php.ini -
Find the line that reads
;cgi.fix_pathinfo=1 -
Change it to read
cgi.fix_pathinfo=0 -
Save and exit (Ctrl+x, Y, Enter)
Installing Additional Dependencies
Install MongoDB dependencies and extension:
sudo apt-get install php8.3-dev php-pear build-essential libssl-dev libcurl4-openssl-dev pkg-config
sudo pecl install mongodb
sudo sh -c 'echo "extension=mongodb.so" > /etc/php/8.3/mods-available/mongodb.ini'
sudo phpenmod mongodb
Accept all the defaults for mongodb unless you have specific reasons not to. The defaults are all proven to currently work.
Add MongoDB extension to PHP configuration:
- Edit the php.ini file:
sudo nano /etc/php/8.3/fpm/php.ini - Add the line
extension=mongodbat the bottom of the file (without a preceding semicolon)
Installing Composer
Set up Composer:
cd ~
mkdir bin
php -r "copy('https://getcomposer.org/installer', 'composer-setup.php');"
php composer-setup.php --install-dir=/home/<youruserhere>/bin --filename=composer
After installing Composer, restart your terminal or log out and back in to ensure the changes take effect.
Installing MariaDB
Install MariaDB server (this will be out default MySQL database):
sudo apt-get install mariadb-server -y
Configuring MariaDB
-
Log into MariaDB as root:
sudo mysql -uroot -
Set the root password and create the DreamFactory database:
ALTER USER 'root'@'localhost' IDENTIFIED BY '<Your password here>';FLUSH PRIVILEGES;CREATE DATABASE dreamfactory;Create a user to interface with the DB (default is dfadmin:dfadmin) and give them appropriate permissions:
CREATE USER 'dfadmin'@localhost IDENTIFIED BY 'dfadmin';GRANT ALL PRIVILEGES ON dreamfactory.* TO 'dfadmin'@localhost IDENTIFIED BY 'dfadmin';FLUSH PRIVILEGES;
The user you create for the DreamFactory DB will need to be used when setting up DreamFactory, the default is dfadmin:dfadmin
Installing DreamFactory
-
Create and set up the DreamFactory directory (change dfuser to your user):
sudo mkdir /opt/dreamfactory
sudo chown -R dfuser /opt/dreamfactory -
Clone the DreamFactory repository and install dependencies:
cd /opt/dreamfactory/
git clone https://github.com/dreamfactorysoftware/dreamfactory.git ./
composer install --no-dev --ignore-platform-reqs -
Configure the environment:
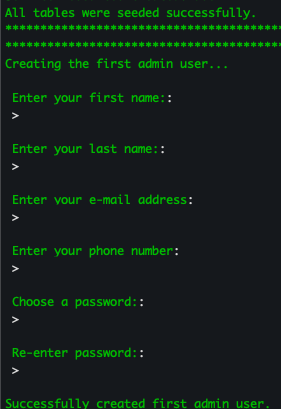
php artisan df:envIf you are following this guide choose option "1" for mysql (mariadb).

Fill in your first and last name, email, phone number and create user login credentials for the Web UI (this password must be 16 characters or longer)
-
Edit the .env file:
nano .env- Uncomment (remove the ##) the two lines that read:
##DB_CHARSET=utf8
##DB_COLLATION=utf8_unicode_ci - Set the following values:
APP_DEBUG=true
APP_LOG_LEVEL=debug
DF_INSTALL=rpi
- Uncomment (remove the ##) the two lines that read:
-
Run the DreamFactory setup:
php artisan df:setup -
Set proper permissions (change dfuser to your user):
sudo chown -R www-data:dfuser storage/ bootstrap/cache/
sudo chmod -R 2775 storage/ bootstrap/cache/ -
Clear the cache:
php artisan cache:clear
Setting up Nginx Config
cd /etc/nginx/sites-available/
sudo cp default default.bak
sudo nano default
Remove all the contents located in default and replace them with:
# Default API call rate -> Here is set to 1 per second, and is later defined in the location /api/v2 section
limit_req_zone $binary_remote_addr zone=mylimit:10m rate=1r/s;

server {
    listen 80 default_server;
    listen [::]:80 default_server ipv6only=on;
    root /opt/dreamfactory/public;
    index index.php index.html index.htm;

    add_header X-Frame-Options "SAMEORIGIN";
    add_header X-XSS-Protection "1; mode=block";

    gzip on;
    gzip_disable "msie6";
    gzip_vary on;
    gzip_proxied any;
    gzip_comp_level 6;
    gzip_buffers 16 8k;
    gzip_http_version 1.1;
    gzip_types text/plain text/css application/json application/javascript text/xml application/xml application/xml+rss text/javascript;

    location / {
        try_files $uri $uri/ /index.php?$args;
    }

    error_page 404 /404.html;
    error_page 500 502 503 504 /50x.html;

    location = /50x.html {
        root /usr/share/nginx/html;
    }

    location ~ \.php$ {
        try_files $uri =404;
        fastcgi_split_path_info ^(.+\.php)(/.+)$;
        fastcgi_pass unix:/var/run/php/php8.3-fpm.sock;
        fastcgi_index index.php;
        fastcgi_param SCRIPT_FILENAME $document_root$fastcgi_script_name;
        include fastcgi_params;
    }

    location ~ /\.ht {
        deny all;
    }

    location ~ /web.config {
        deny all;
    }

    #By default we will limit login calls here using the limit_req_zone set above. The below will allow 1 per second over a
    # 5 seconds (so 5 in 5 seconds)from a single IP  before returning a 429 too many requests. Adjust as needed.
    location /api/v2/user/session {
        try_files $uri $uri/ /index.php?$args;
        limit_req zone=mylimit burst=5 nodelay;
        limit_req_status 429;
    }

    location /api/v2/system/admin/session {
        try_files $uri $uri/ /index.php?$args;
        limit_req zone=mylimit burst=5 nodelay;
        limit_req_status 429;
    }
}
Restart Nginx and PHP
sudo systemctl restart nginx php8.3-fpm.service
Access your new DreamFactory instance
After the services are restarted your web server should be ready to access. Go ahead and in your preferred browser type in the ip address of your Raspberry Pi and you should see the login page of the DreamFactory Web UI. To find your ip address on Raspberry Pi easily type in the command line hostname -I
Raspberry Pi 4 vs Pi 5 Compatibility
This guide was written and tested against the Raspberry Pi 4 (4GB RAM) running Raspberry Pi OS 64-bit (Bookworm, Debian 12). The Pi 4 uses a Cortex-A72 ARMv8 CPU; the Pi 5 uses a Cortex-A76 ARMv8 CPU — both are 64-bit ARM architectures and both run Raspberry Pi OS Bookworm 64-bit.
Raspberry Pi 5 compatibility: The installation steps in this guide apply to the Pi 5 with no changes. The Pi 5 is faster (Cortex-A76 cores, ~2× Pi 4 single-thread performance) and handles DreamFactory's PHP-FPM workload more comfortably. If you have a Pi 5, follow this guide exactly as written.
Key differences to be aware of:
- The Pi 5 uses a different power connector (USB-C PD 5A) and requires a 27W power supply for full performance under load.
- The Pi 5's default OS image is also Bookworm — the same PHP repository, package names, and Nginx config apply.
- If you installed a 32-bit OS image by mistake, some PHP extensions (notably
php8.3-devbuild steps) may behave differently. Use the 64-bit OS image for DreamFactory.
Installing MariaDB/MySQL on Clear Linux OS
The steps earlier in this guide use Raspberry Pi OS (Debian-based). The section below is for users running Intel Clear Linux OS on embedded or edge hardware and who found this guide via search queries about Clear Linux package names.
Clear Linux OS uses a different package manager (swupd) and a different package naming convention from Debian/Ubuntu. There is no apt and no devpkg-mariadb bundle with that exact name. The correct Clear Linux bundle names for MariaDB are:
# Install the MariaDB server and client
sudo swupd bundle-add mariadb

# Install the database utilities bundle (includes MySQL-compatible CLI tools)
sudo swupd bundle-add database-basic
On Clear Linux, development headers (the equivalent of libmariadb-dev on Debian) are included in the main mariadb bundle — you do not need a separate devpkg-mariadb bundle. The bundle naming convention devpkg-* exists for some libraries (e.g., devpkg-openssl) but not for MariaDB, which ships headers with its primary bundle.
Verify the installation:
sudo systemctl enable --now mariadb
mysql --version
# Expected output: mysql  Ver 15.1 Distrib 10.x.x-MariaDB, ...
To secure MariaDB after installation:
sudo mysql_secure_installation
Then create the DreamFactory database and user:
CREATE DATABASE dreamfactory;
CREATE USER 'dfadmin'@'localhost' IDENTIFIED BY 'dfadmin';
GRANT ALL PRIVILEGES ON dreamfactory.* TO 'dfadmin'@'localhost';
FLUSH PRIVILEGES;
For PHP-to-MariaDB connectivity on Clear Linux, install the PHP bundle that includes the MySQL extension:
sudo swupd bundle-add php-basic
If you need a specific PHP version or additional extensions not in php-basic, check available bundles:
swupd bundle-list --all | grep php
Nginx Installation on Raspberry Pi
This section provides step-by-step instructions for users installing Nginx for the first time (including those following German-language searches for "Raspberry Pi Nginx installieren").
Nginx is already covered in the main install flow above, but here is a complete standalone reference:
Install Nginx
sudo apt update
sudo apt install -y nginx
Enable and Start Nginx
sudo systemctl enable nginx
sudo systemctl start nginx
Verify it is running:
sudo systemctl status nginx
# Should show: active (running)
Test from the Pi itself:
curl http://localhost
# Should return the default Nginx welcome page HTML
DreamFactory Nginx Virtual Host Configuration
Once DreamFactory is installed at /opt/dreamfactory, replace the default Nginx site config at /etc/nginx/sites-available/default with the DreamFactory-specific config shown in the Setting up Nginx Config section above.
The key settings for DreamFactory are:
root /opt/dreamfactory/public;— points to DreamFactory's public directoryfastcgi_pass unix:/var/run/php/php8.3-fpm.sock;— connects Nginx to PHP-FPMtry_files $uri $uri/ /index.php?$args;— routes all requests through Laravel's front controller
After saving the config, always test before reloading:
sudo nginx -t
# Output: syntax is ok / test is successful
sudo systemctl reload nginx
Performance Tuning for Raspberry Pi
The Raspberry Pi has limited RAM and CPU compared to a server. These tuning recommendations help DreamFactory run reliably on 4GB Pi hardware.
PHP-FPM Worker Count
The default PHP-FPM pool spawns workers dynamically, which can exhaust RAM on a 4GB Pi when handling multiple concurrent API requests. Edit the PHP-FPM pool config:
sudo nano /etc/php/8.3/fpm/pool.d/www.conf
Recommended settings for a 4GB Pi 4 (DreamFactory only, no other heavy services):
pm = static
pm.max_children = 4
pm.max_requests = 500
For a 4GB Pi running other services alongside DreamFactory, use 2 workers:
pm = static
pm.max_children = 2
Each PHP-FPM worker uses approximately 40–60MB of RAM under DreamFactory load. With pm.max_children = 4, peak PHP memory usage will be ~240MB, leaving headroom for the OS, MySQL, and Nginx.
MariaDB / MySQL innodb_buffer_pool_size
The InnoDB buffer pool caches database pages in RAM. The default value is 128MB, which is fine for a Pi but can be tuned. Add the following to /etc/mysql/mariadb.conf.d/99-dreamfactory.cnf (create the file if it does not exist):
[mysqld]
innodb_buffer_pool_size = 256M
innodb_log_file_size = 64M
max_connections = 50
query_cache_size = 0
query_cache_type = 0
A 256MB buffer pool on a 4GB Pi leaves ~3.5GB for the OS, Nginx, and PHP-FPM. Do not set this higher than 512MB on a 4GB Pi.
Apply changes by restarting MariaDB:
sudo systemctl restart mariadb
Nginx worker_processes
In /etc/nginx/nginx.conf, set:
worker_processes auto;
auto detects the number of CPU cores (4 on Pi 4, 4 on Pi 5) and spawns one Nginx worker per core. This is optimal — Nginx workers are lightweight and the Pi benefits from using all cores for request handling.
Swap Space
DreamFactory's Composer install step and initial migration can temporarily exceed 4GB RAM on a Pi 4. Ensure at least 2GB of swap is configured:
sudo dphys-swapfile swapconf
sudo nano /etc/dphys-swapfile
# Set: CONF_SWAPSIZE=2048
sudo dphys-swapfile setup
sudo dphys-swapfile swapon
After installation is complete you can reduce swap, but during the Composer dependency installation step having 2GB available prevents out-of-memory failures.